Macrame, the ancient art of knotting cord to create intricate patterns, might seem intimidating, but it's surprisingly accessible! This beginner-friendly tutorial will guide you through the creation of a beautiful and functional plant hanger, perfect for showcasing your favorite potted greenery. Forget complicated designs and frustratingly fiddly tassels – we're focusing on a simple, elegant style that even absolute beginners can master with ease. You'll be amazed at how quickly you can transform simple cords into a charming addition to your home décor.
This project requires minimal materials and even less experience. We’ll walk you through each step, using clear instructions and helpful images to ensure a successful outcome. Ready to add a touch of bohemian chic to your space? Then let's dive into the step-by-step process and create your very own macrame plant hanger!
Preparation and Safety Guidelines
- 120 feet of 5mm cord (peacock color recommended)
- One-inch metal O-ring
- One-and-a-half-inch metal O-ring
- Ruler
- Scissors
- Tape (optional)
- Always use sharp scissors to cut your cord. Dull scissors can lead to frayed ends and make knotting more difficult.
- Avoid pulling cords too tightly, especially when starting out. This can cause the knots to become misshapen or difficult to adjust.
- If using natural fibers like cotton, be mindful of moisture. Excess moisture can cause the cord to shrink or weaken, potentially damaging your plant hanger.
Step-by-Step Instructions
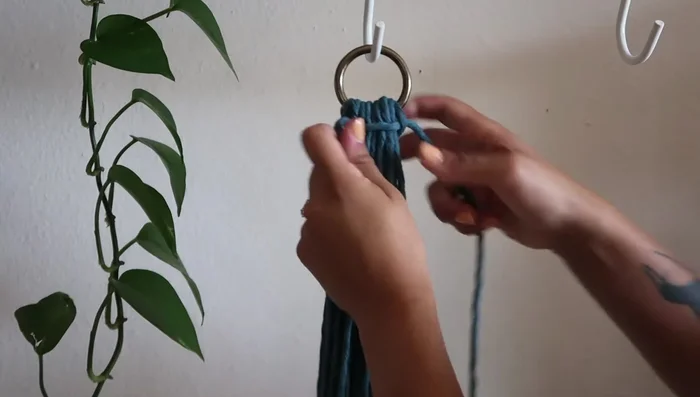
Prepare the cords
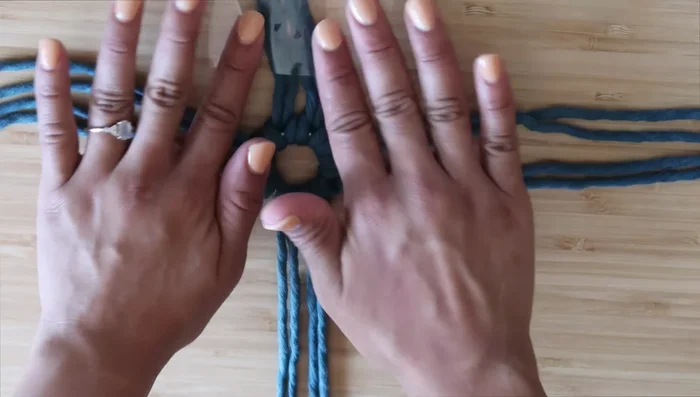
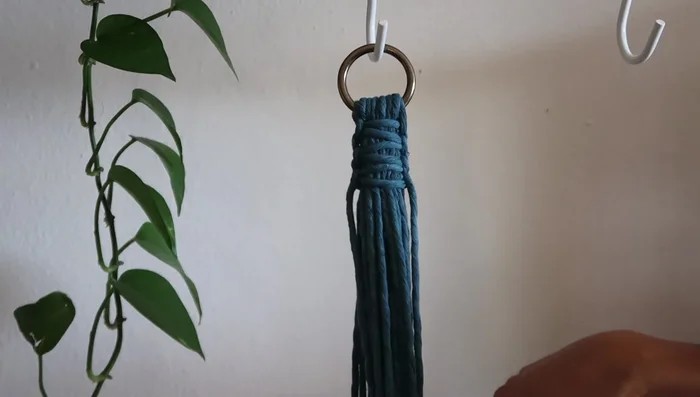
- Cut eight 15-foot strands of cord and attach each to the one-inch O-ring using a reverse lark's head knot.

Prepare the cords Create the main body
- Divide the cords into four sections (two cords per section). Create ten square knots in each section.
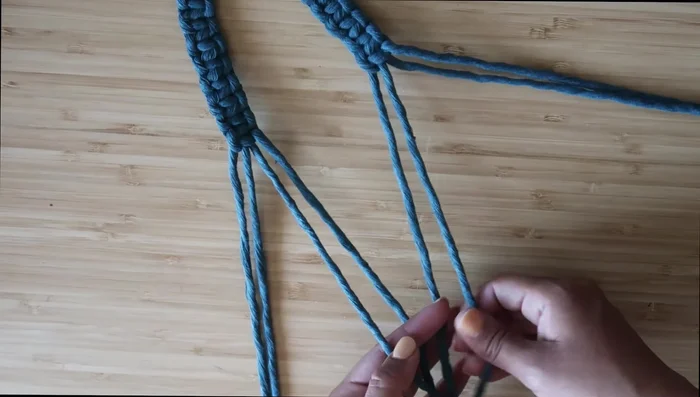
Create the main body Create the first set of connecting knots
- Combine two arms at a time. Create three square knots about 4.5 inches down from the previous knots.
- Repeat step 3 for all four sections.
Create the first set of connecting knots Create the remaining knots
- Create 17 more square knots on each side of the previous knots (for a total of 20 square knots per side).
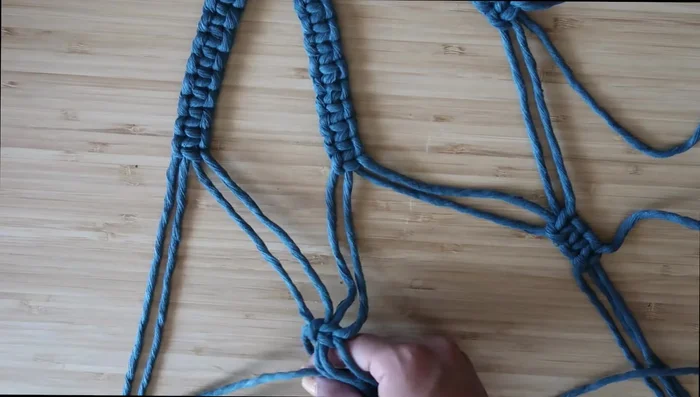
Create the remaining knots Attach the pot
- Place a pot (6-inch recommended, but 4-10 inch works) in the center of the square knots.
Attach the pot Attach the bottom ring
- Thread all cords through the one-and-a-half-inch O-ring, leaving about 6 inches of cord.
- Create three square knots at the bottom to secure the O-ring.
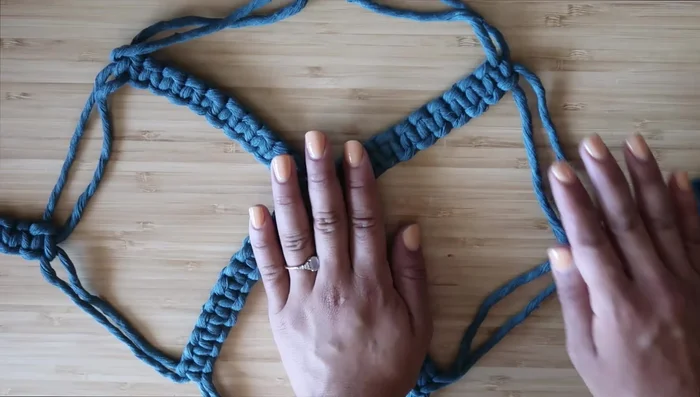
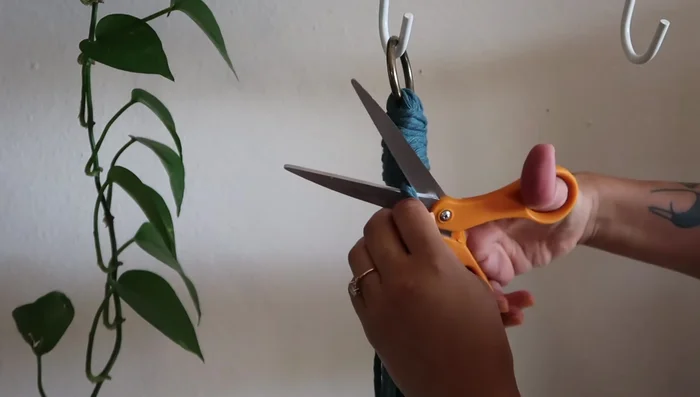
Attach the bottom ring Trim excess cords
- Cut off excess strands.
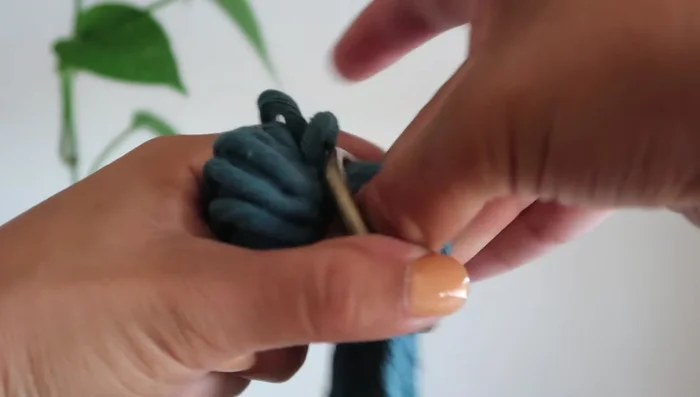
Trim excess cords Create and secure the gathering knot
- Use a three-foot strand to create a gathering knot, wrapping it around the square knots about 10 times, leaving a gap at the bottom. Pull the strand through the gap and tighten.
Create and secure the gathering knot Final trim
- Carefully cut off the excess strands from the gathering knot.
Final trim


Tips
- Use tape to keep cords in place during knotting.
- Use a ruler to ensure even spacing between knots.
- Tighten knots securely to prevent unraveling.
- Be careful when cutting excess strands to avoid cutting the plant hanger strands.