Creating beautiful and functional planter stands is a rewarding woodworking project, perfect for adding a touch of rustic charm to your garden or patio. This tutorial focuses on building sturdy planter stands using two classic joinery techniques: the half-lap and the tenon joint. These strong and aesthetically pleasing joints ensure your stands can withstand the weight of even the heaviest potted plants, lasting for years to come. We’ll explore the advantages of each joint type and how their careful construction contributes to a robust and visually appealing finished product. Building your own stands also allows for complete customization, letting you tailor the size, style, and finish to perfectly match your outdoor space.
This detailed guide will walk you through each step of the process, from selecting the right lumber and cutting precise joints to assembling and finishing your planter stands. Whether you’re a seasoned woodworker or a curious beginner, get ready to embark on this satisfying project; we'll provide clear instructions and helpful tips to ensure success. Let’s get started!
Preparation and Safety Guidelines
- Maple lumber
- Jointing sled
- Planer
- Table saw
- Table saw sled
- Micro Jig Matchfit Dado Stop
- Crosscut sled
- Beadlock Basic Loose Tenon Kit
- Drill
- Dust collector
- Clamps
- Chisel
- Sandpaper
- Wood finish
- Always wear safety glasses to protect your eyes from flying debris and wood chips.
- Use clamps to secure your wood pieces firmly during cutting and assembly to prevent injury.
- Ensure proper ventilation when using power tools and finishes to avoid inhaling harmful fumes.
Step-by-Step Instructions
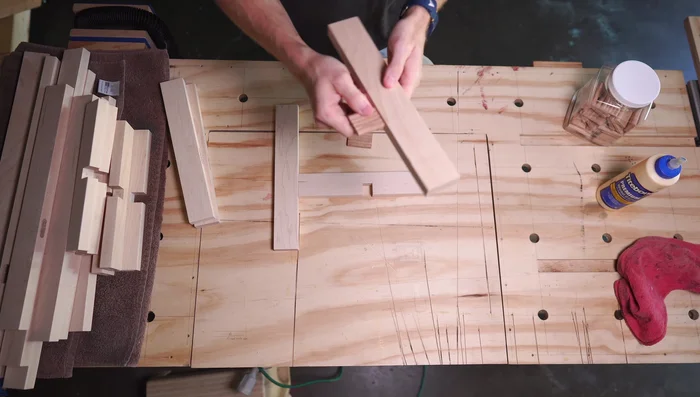
Prepare Lumber
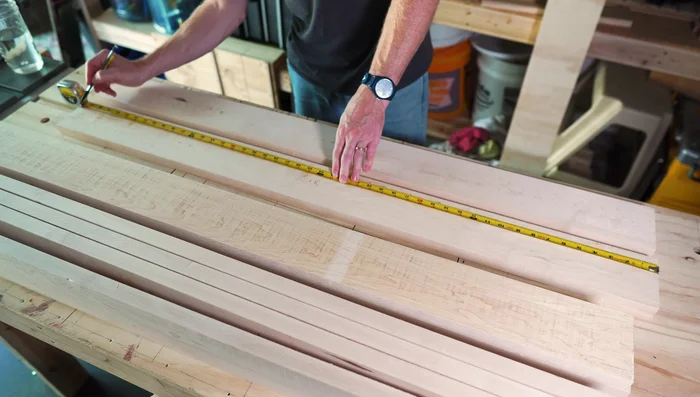
- Flatten one side of each board using a jointing sled and plane the other side to match. Cut all pieces to length using a table saw sled.

Prepare Lumber Cut to Final Dimensions
- Rip boards to final width. All stand pieces are the same width, so set the fence once and repeat cuts.
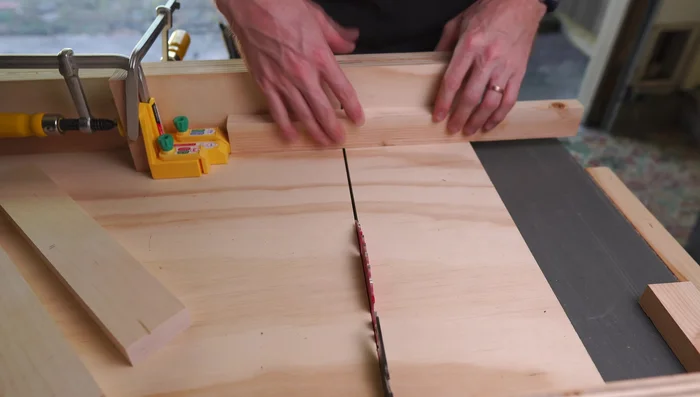
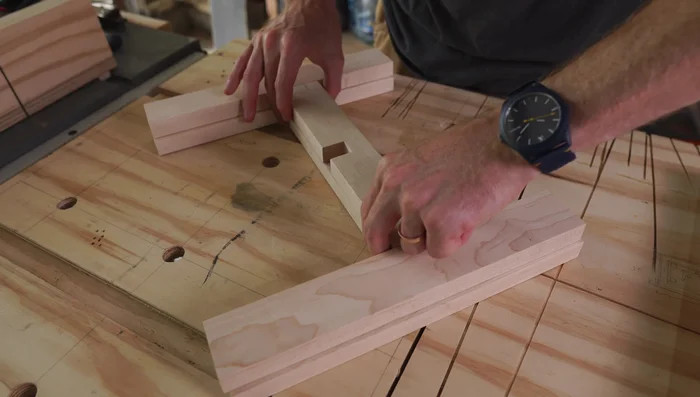
Cut to Final Dimensions Create Half-Lap Joints
- Make two cuts to establish the outside edges of each notch, using the Micro Jig Matchfit Dado Stop on a crosscut sled. Make further cuts to remove the rest of the material.
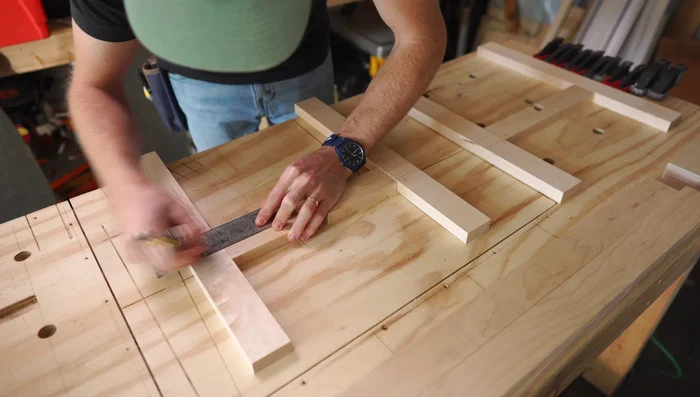
Create Half-Lap Joints Create Mortise and Tenon Joints
- Mark reference lines for cutting joinery between legs and cross pieces. Use the Beadlock Basic Loose Tenon Kit to drill out the mortises and tenons.
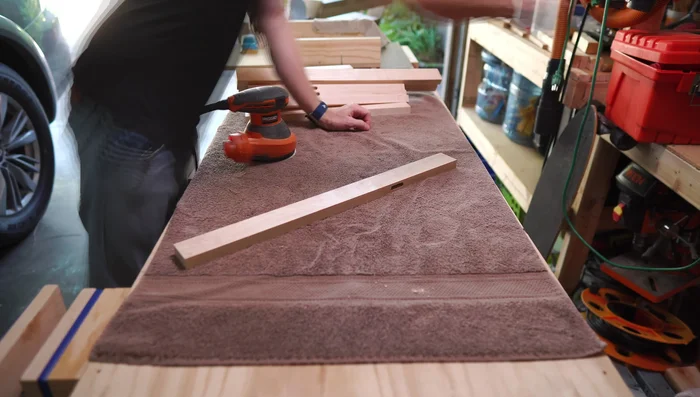
Create Mortise and Tenon Joints Pre-Assembly Sanding
- Sand all pieces before assembly. Pay attention to corners that will be difficult to reach after assembly.
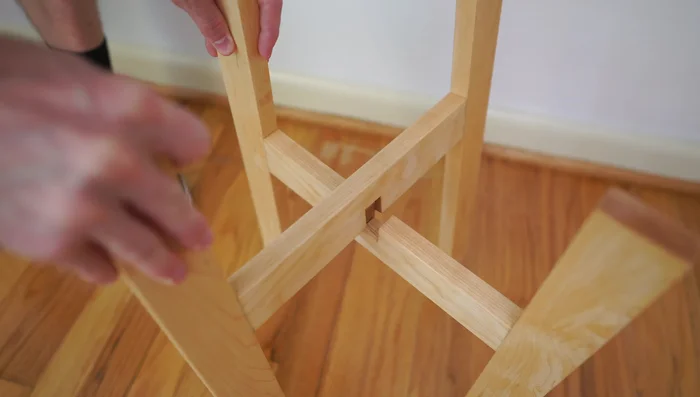
Pre-Assembly Sanding Glue and Clamp (Initial Assembly)
- Test fit before gluing. If pieces don't fit, adjust before forcing them together.
Glue and Clamp (Initial Assembly) Troubleshoot Crooked Joints
- If mortises are crooked (as experienced with the Beadlock Basic jig), sand down the tenons to allow for adjustment. Use plenty of glue to fill gaps.
Final Assembly and Trimming
- Assemble the planter stands, ensuring legs are even. Trim legs to the same length if necessary to eliminate wobble.
Final Assembly and Trimming Sand and Finish
- Sand and finish.
Sand and Finish

Read more: Cleaning and Organizing a Plant-Filled Office: A Step-by-Step Guide
Tips
- Always be mindful of your fingers and the blade when using table saws.
- Cut test pieces before cutting your actual pieces to ensure a proper fit.
- If something doesn't fit right, don't force it together. Stop and fix the issue.
- Use a dust collector to minimize dust and chips, especially when using the Beadlock Basic jig.
- The Beadlock Basic jig might not be the most accurate; consider the Beadlock Pro for improved accuracy.