Vanda orchids, with their vibrant blooms and striking aerial roots, deserve more than just a basic pot. They thrive when their roots can breathe and bask in the light, making the right hanger crucial to their health and beauty. While many DIY orchid hanger solutions exist, achieving a truly deluxe, rust-proof result can be challenging. This often leads to frustrating replacements, wasted materials, and potentially damaged plants. But fear not, orchid enthusiasts! This article details a superior method for creating long-lasting, aesthetically pleasing hangers that will perfectly support your prized Vanda orchids.
This guide will walk you through a meticulously crafted process, eliminating the common pitfalls of DIY orchid hangers and ensuring a beautiful, durable, and ultimately, better home for your plants. Ready to create the ultimate Vanda orchid hanger, one that’s both stunning and built to withstand the elements? Let’s delve into the step-by-step instructions.
Preparation and Safety Guidelines
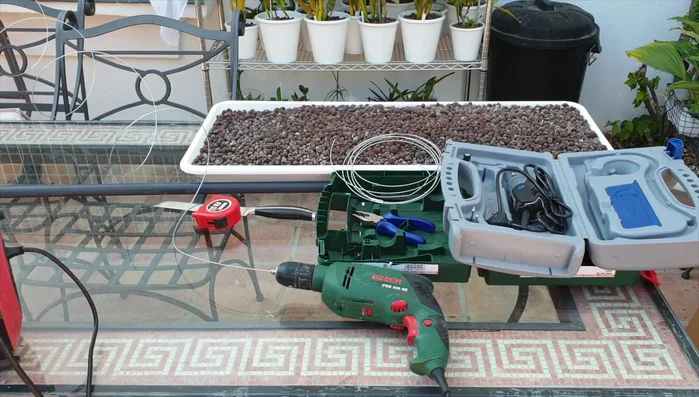
- Drill
- Wire (thin gauge)
- Plastic cable organizer
- Duct tape
- Scissors/Wire cutters
- Always use rust-proof materials: Vanda orchids are sensitive to chemicals. Avoid using any galvanized metal, which contains zinc that can leach into the water and harm your plant.
- Ensure proper drainage: The hanger must allow for excellent drainage to prevent root rot. Overwatering is a common killer of Vanda orchids.
- Avoid sharp edges: Carefully smooth any rough or sharp edges on your hanger materials to prevent damage to the orchid's roots or leaves during hanging or maintenance.
Step-by-Step Instructions
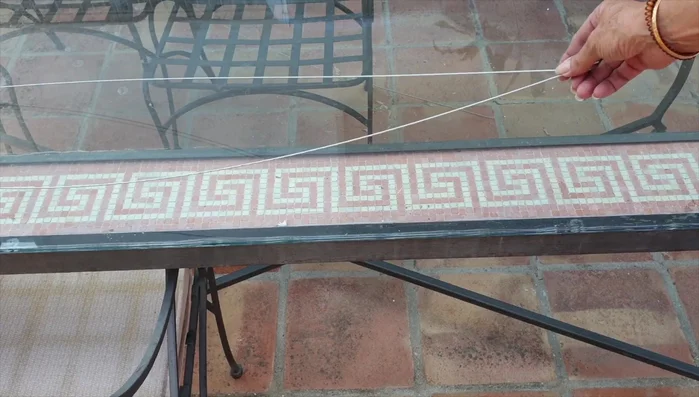
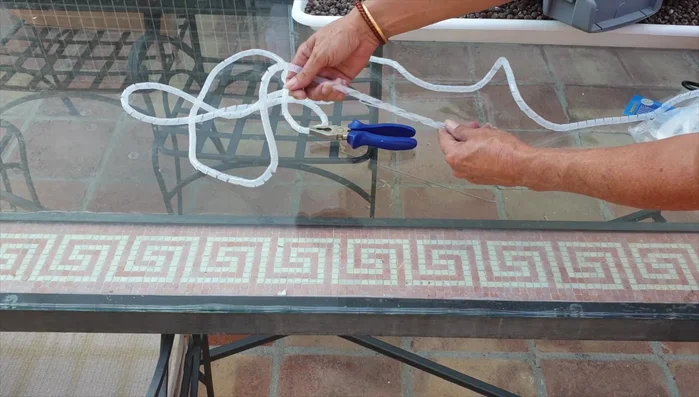
Straighten the Wire
- Straighten the wire using a drill. Insert the end of the wire into the drill chuck, tighten securely, and run the drill to straighten the wire.

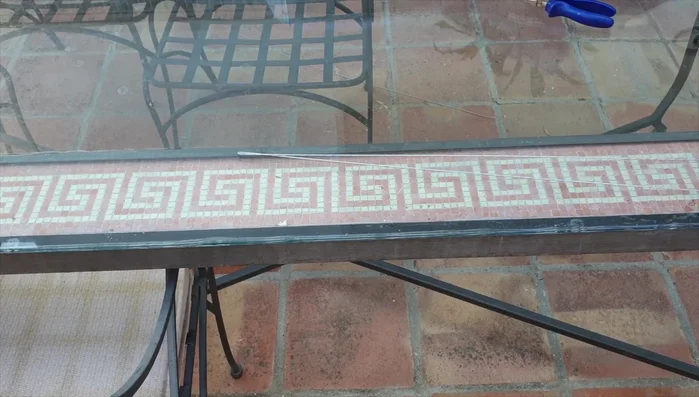
Straighten the Wire Prepare the Wire
- Cut a piece of wire to the desired length, doubling it over to create a hook at the top.
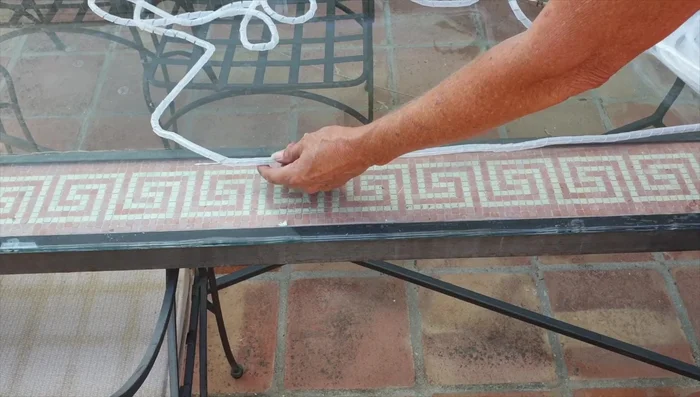
Prepare the Wire Add Root Protection
- Slide a section of the plastic cable organizer onto the wire to protect the orchid roots from the wire and prevent rust.
Add Root Protection Create the Hook
- Create a hook at the top of the wire by bending it. Secure the ends of the wire with duct tape.
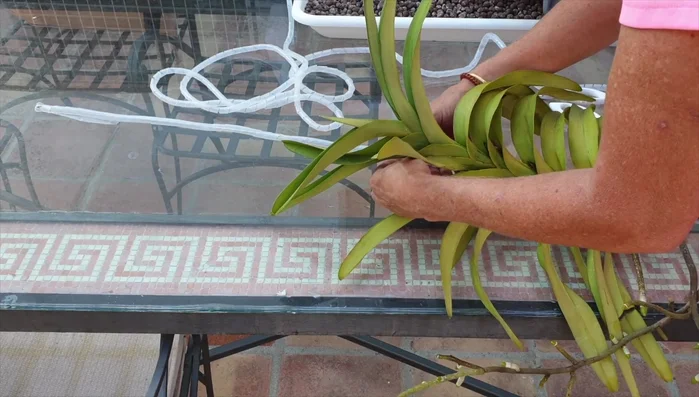
Create the Hook Attach the Orchid
- Carefully position and tie the orchid to the hanger, ensuring it hangs securely without spreading.
Attach the Orchid Secure the Orchid
- Add additional support loops/ties to further secure the orchid and prevent slippage.
Secure the Orchid
Read more: Beginner-Friendly Macrame Plant Hanger (No Tassel!)
Tips
- Reinforce small gauge wire by straightening it with a drill for strength and durability.
- Use plastic tubing or a similar material to protect both the wire from rust and the orchid roots from burning. This method is presented as superior to using only tape.
- Ensure that the top hook is positioned correctly to prevent the orchid from spreading across the rack.